用brew的好处是稍微省心一些,不用折腾更新什么的,万一要重装什么的也可以brew bundle dump然后在新机器上brew bundle一把了事。
brew安装QT开发环境也确实简单,两条命令而已:
brew install qt
brew install qt-creator
brew安装的时候已经安装好了
Xcode Command Line Tools等,必要的话把它更新一下(App Store会自动提醒)。网上有些教程说安装QT之前要安装Xcode完整版,这个我已经没有条件试验了,但我印象中是先brew install qt然后才安装的Xcode。
¶ 配置
上面两条命令之间是没有关联的,后装的qt-creator不会自动检测到前面的qt(qt这个包是QT开发工具链),所以需要配置。
首先brew info qt一下,可以看到:
╰─ brew info qt
qt: stable 5.10.0 (bottled), HEAD [keg-only]
Cross-platform application and UI framework
https://www.qt.io/
/usr/local/Cellar/qt/5.10.0 (9,351 files, 290MB)
  Poured from bottle on 2017-12-30 at 20:16:37
From: https://github.com/Homebrew/homebrew-core/blob/master/Formula/qt.rb
==> Dependencies
Build: pkg-config ✘
Optional: mysql ✘, postgresql ✘
==> Requirements
Build: xcode ✔
Required: macOS >= 10.8 ✔
==> Options
--with-docs
    Build documentation
--with-examples
    Build examples
--with-mysql
    Build with mysql support
--with-postgresql
    Build with postgresql support
--HEAD
    Install HEAD version
==> Caveats
We agreed to the Qt opensource license for you.
If this is unacceptable you should uninstall.

This formula is keg-only, which means it was not symlinked into /usr/local,
because Qt 5 has CMake issues when linked.

If you need to have this software first in your PATH run:
  echo 'export PATH="/usr/local/opt/qt/bin:$PATH"' >> ~/.zshrc

For compilers to find this software you may need to set:
    LDFLAGS:  -L/usr/local/opt/qt/lib
    CPPFLAGS: -I/usr/local/opt/qt/include
显然,为了不跟系统过多耦合导致问题,qt包根本没把自己注册到系统里,也就是装完qt也不能直接在命令行qmake,而是需要/usr/local/opt/qt/bin/qmake。知道了qmake工具链的路径,就可以开始配置:
- 打开QT Creator的设置,到
QtVersions,点击“添加”,在浏览窗口中按CMD+Shift+G,弹出“前往文件夹”对话框,输入/usr/local,点确定,浏览到/usr/local/opt/qt/bin/qmake,点确定。
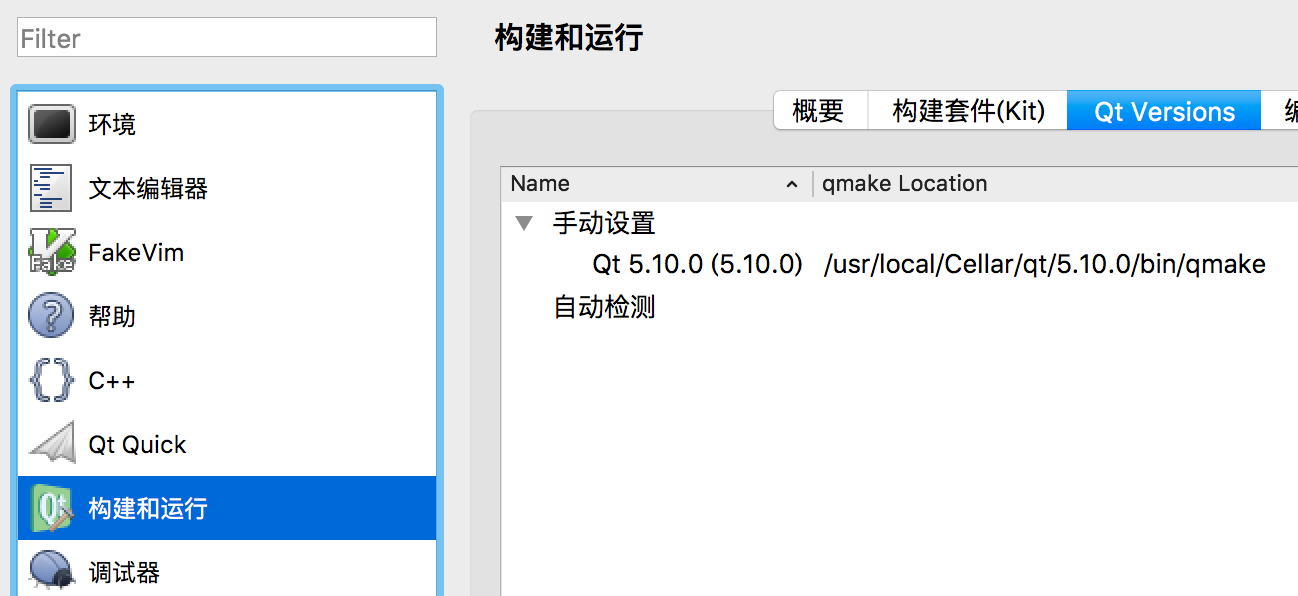
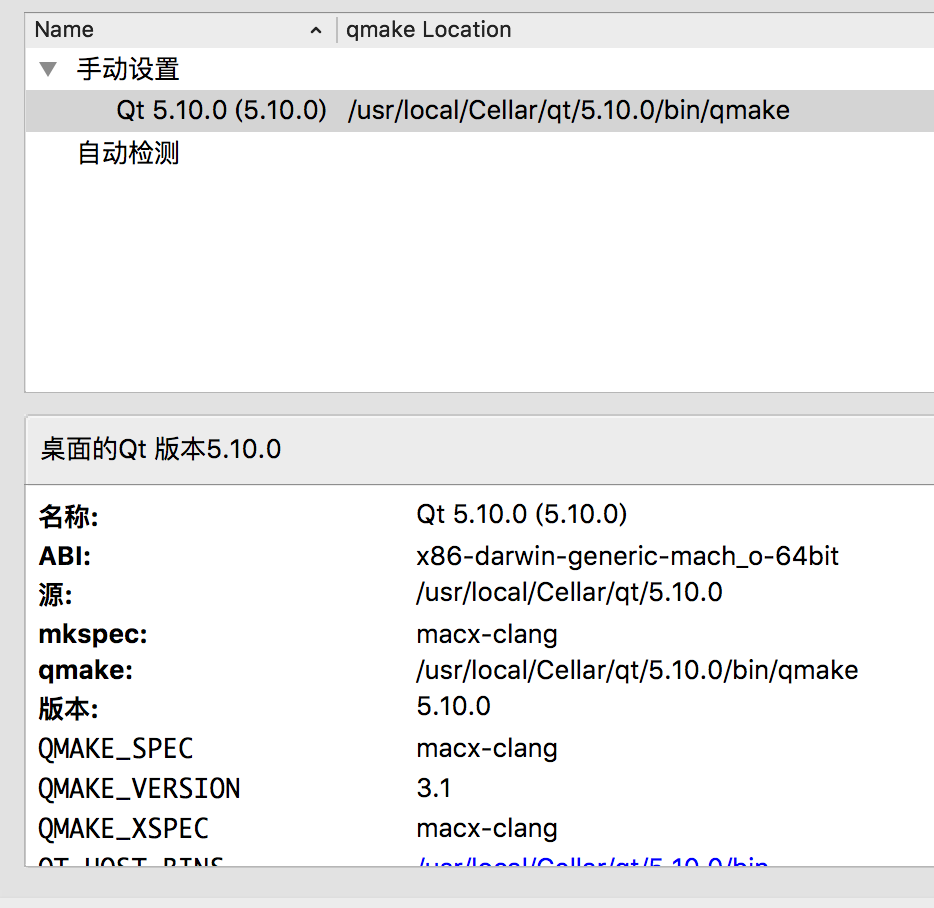
QT Creator会自动检测到这个qt的版本。 - 此时点击刚给添加的这一行,展开下面的“详情”,可以看出,显然这套东西是
Clang编译出来的:
- 回到前面的“构建套件”,一般装好了之后都有一个默认的“桌面”套件了,只是没有与
qt工具链关联。从下拉菜单中选择刚给新加入的qt,这里是QT 5.10.0:
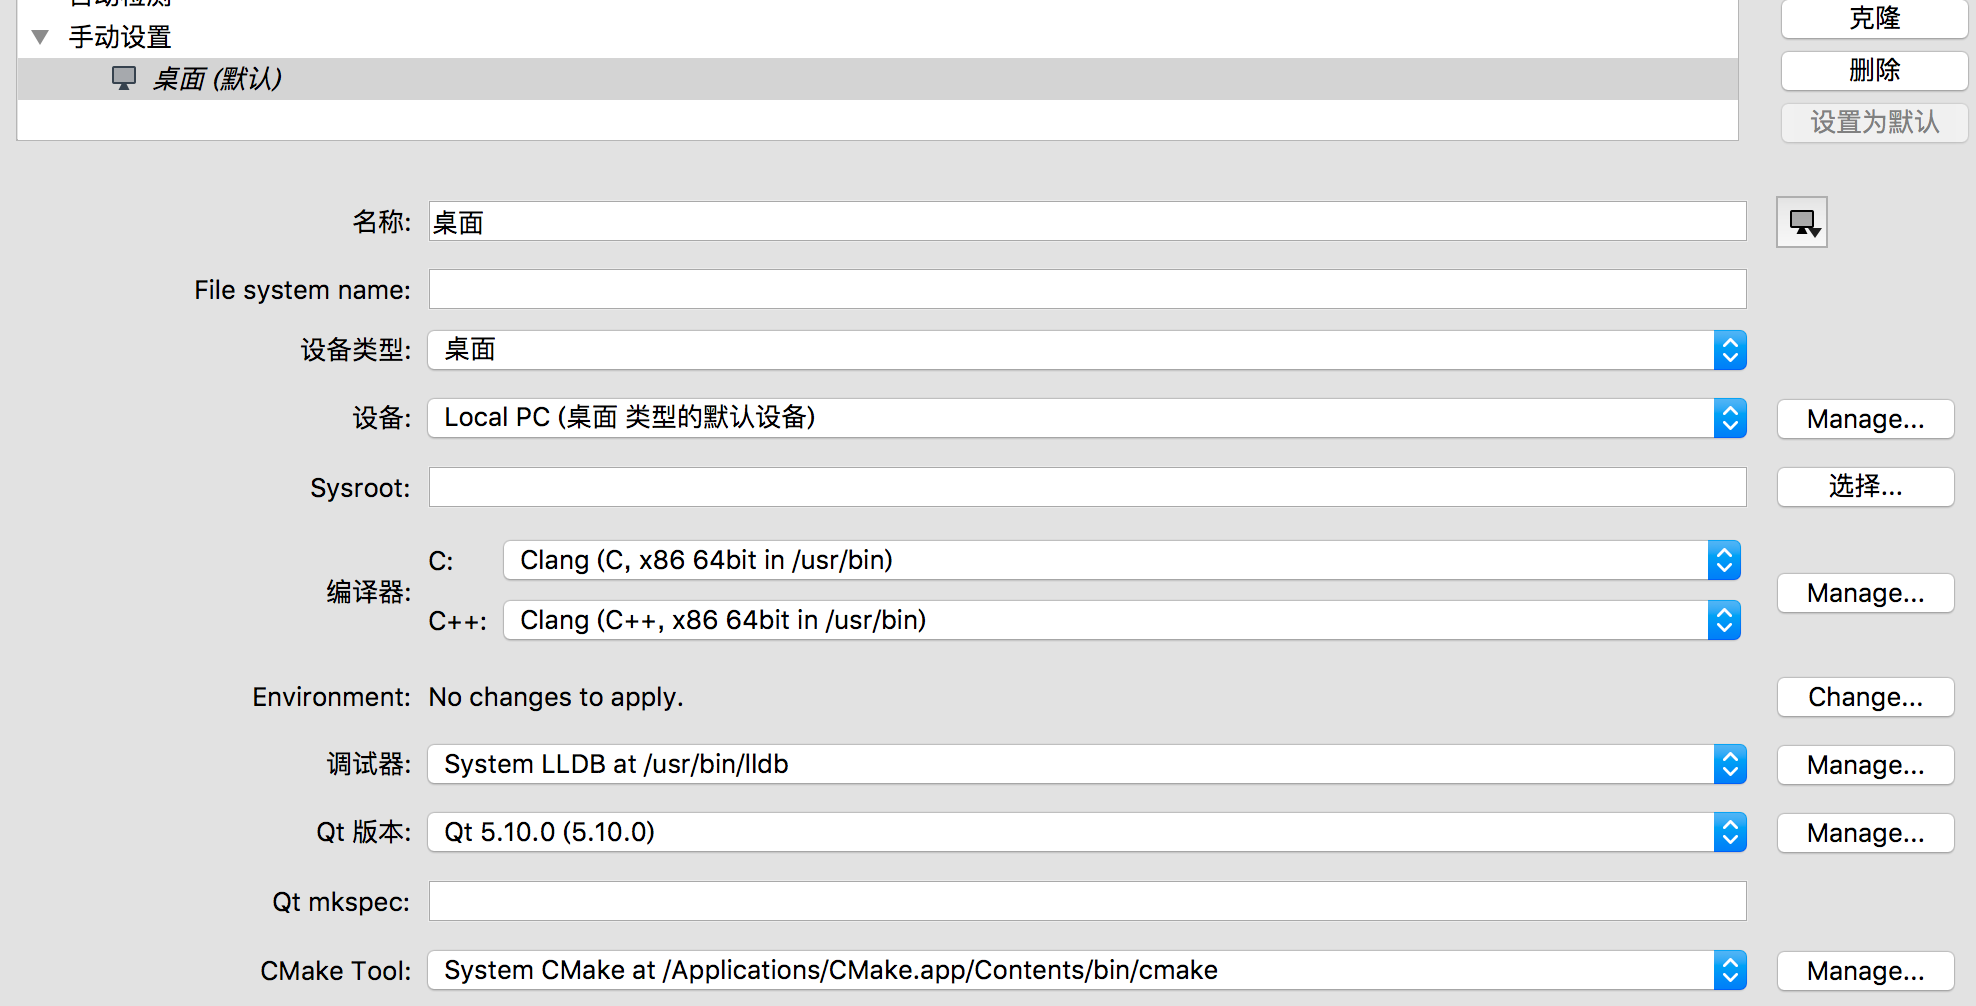
大部分其他项目留默认就好,但是:
非常重要:既然这里的
qt是Clang编译出来的,那么“编译器”一栏默认的GCC当然就不合适了,必须改为Clang,参见上图。不修改的话,构建项目时会报错Project ERROR: failed to parse default search paths from compiler output.
其他参考图中配置。
4. 这时候应该已经好了,去新建项目测试一下吧。首先看项目是不是可以正常编译运行,然后测试能不能单步调试。